Contents:
Introduction
News blog
What is Servoy?
Getting Started
Comparison Servoy/VFP
Performance
How-To's
Code Reference
VFP2Servoy Toolkit
Contact / feedback
|
How to start using the IBM Smart Cloud Servoy Server Image
At ServoyWorld 2011 Servoy and IBM held a presentation on the collaboration efforts to effortlessly get a Servoy Application Server Image up and running in IBM's Smart Cloud Initiative.
With this initiative it becomes possible to host your Servoy Solutions in the Cloud without having to setup your own server. Within minutes (after receiving your credentials which can take a few weeks!) you can
activate a Servoy instance in IBM's Smart Cloud. You don't have to worry about Server maintenance and configuration and pay only for the hours it is online. Even if you keep it online 24/7 the costs will be less than €60 a month.
The hardest part for me was to get my credentials which took 4-6 weeks. Later I understood that IBM is not used to external customers, they are used to everybody being a customer already which I find pretty funny.
Anyway now that I have the credentials we can get to work. Where do we go?
First check out this page on Cloud Computing with IBM and information on available instances: IBM Smart Cloud Enterprise. Here
you will find all necessary information on pricing and registering. If you register and didn't hear anything for a week you may want to send a mail or better yet phone IBM and wake them up.
Next, lets go to the Dashboard page from where we can initialize our virtual server.
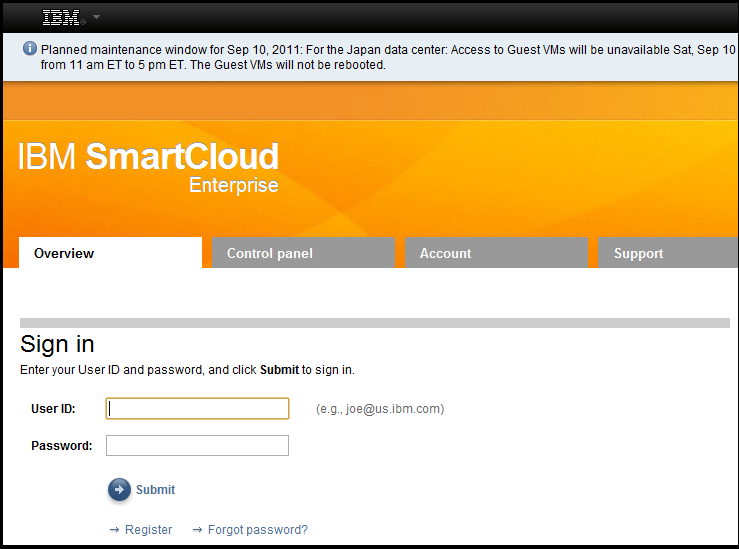
Once you have your credentials you can login as shown above.
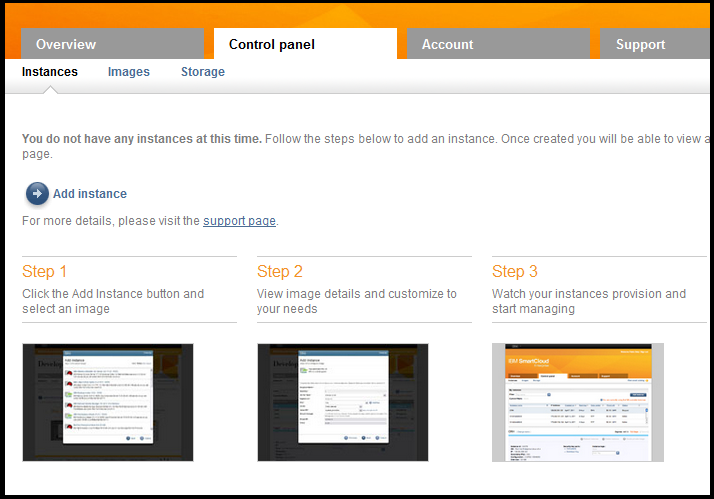
Go to the Control Panel tab and press Add instance.
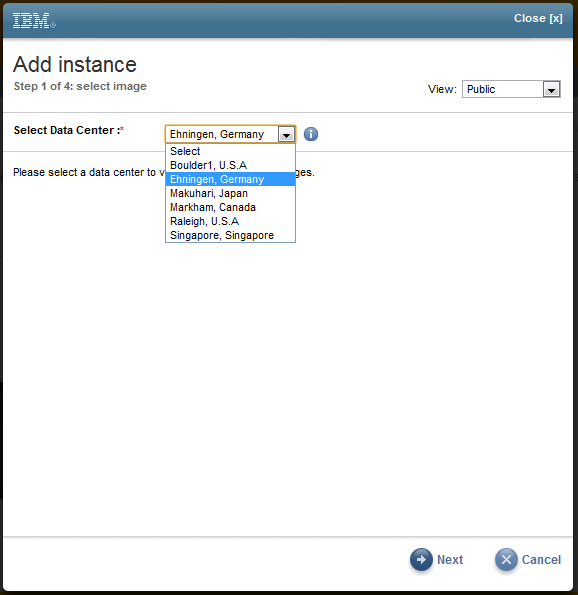
Choose the data-center where you want to host your server. The physical location of the data-center shouldn't matter so just choose the one you are most comfortable with.

Of course the instance you want to install is the Servoy image at the bottom of the list. For now only a Windows Server 2008 can be chosen. Make sure you select the entry instead of the hyperlink and press Next.
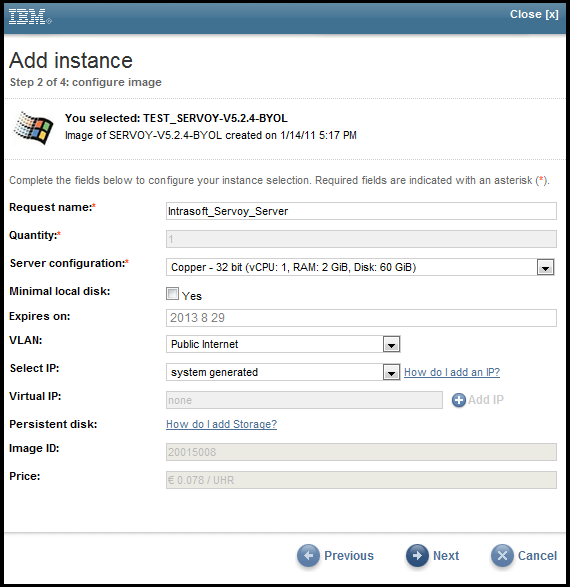
Select the default options when configuring the server and take care upgrading it to faster hardware unless you really need it or you will pay more and prices may go up pretty fast. Click Next.
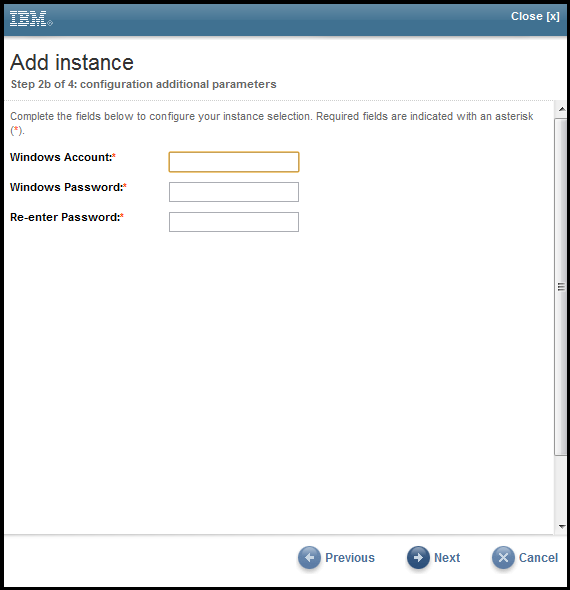
Note: You can choose any accountname you want as long as it is: servoyadmin!!
Otherwise Servoy will not work properly. The reason for this is that the image was also created using the account servoyadmin.
The password can be anything you want but of course it is wise to use a strong password.
Choose a windows account and password for your server. You may want to write these down ;-). Click Next.
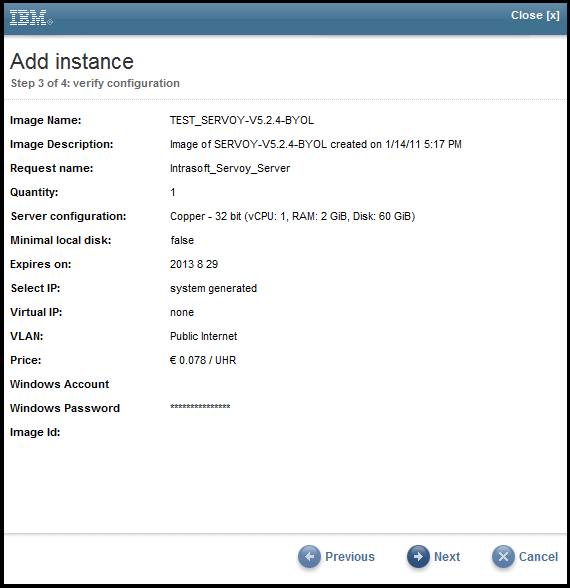
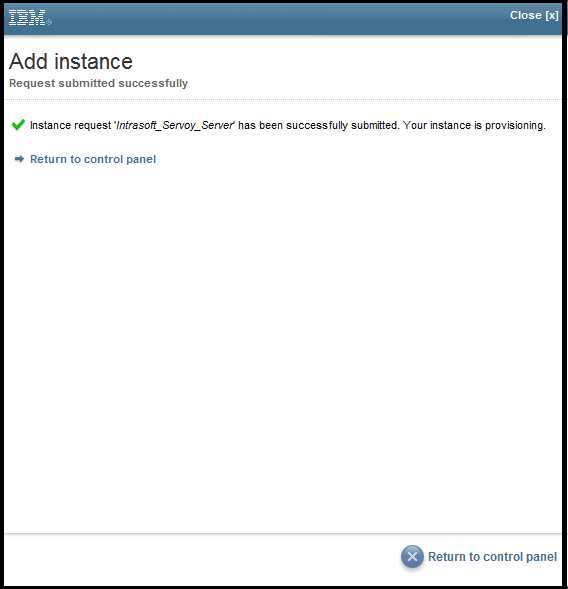
A summary screen is shown, confirming your choices. Pay special attention to the price per hour. Click Next.
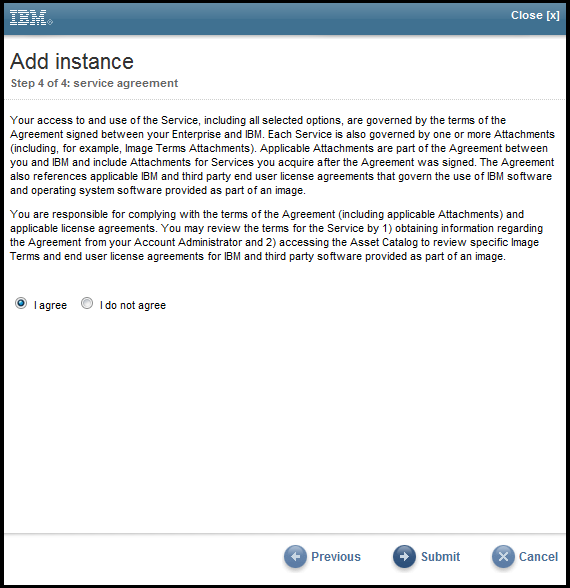
Accept the license aggreement and press Submit.
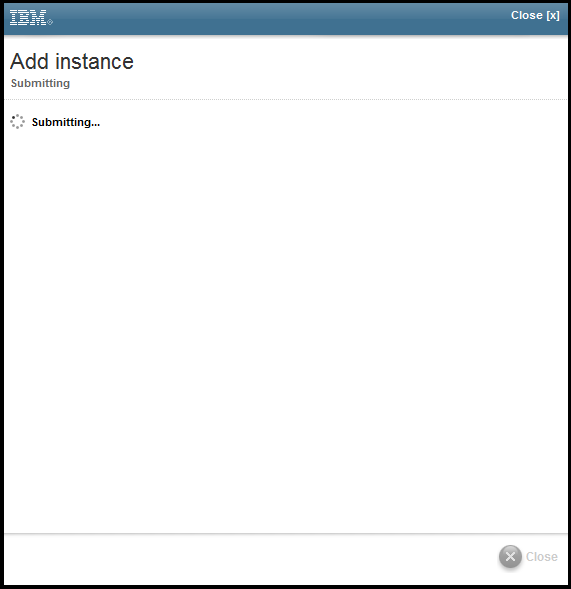
Grab a cup of coffee while your server is prepared.
Go back to the Control Panel and wait for the server to be provisioned.
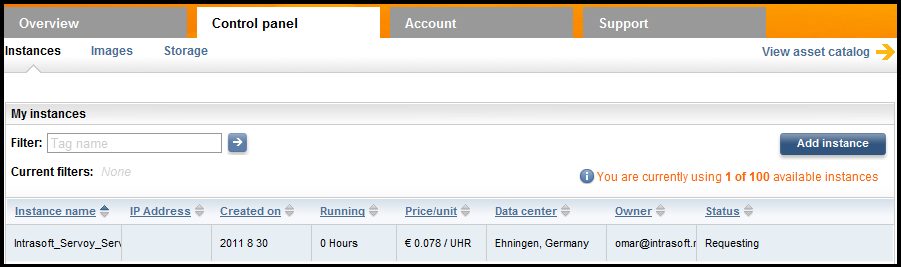
In the Control Panel you can see the status. First the status will be requesting and after a minute or so it will change to Provisioning. Note that the Control Panel not only shows the price
per hour but also the number of hours that your server has been running. Important! If you don't want to use the server anymore delete it or your monthly costs may continue.
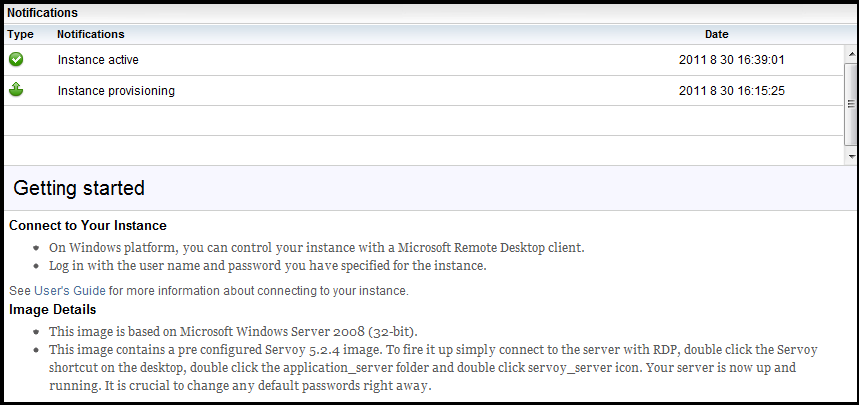
After 20-30 minutes or so you will see the status change to active. At the bottom of the Control Panel under Notifications you will also see the timestamp in case you want to know how long it took to become active.
Below the notifications you will find Gettings Started instructions. Note that your Control Panel also shows the IP-addres for your server. You need this to be able to connect to your server with Remote Desktop.
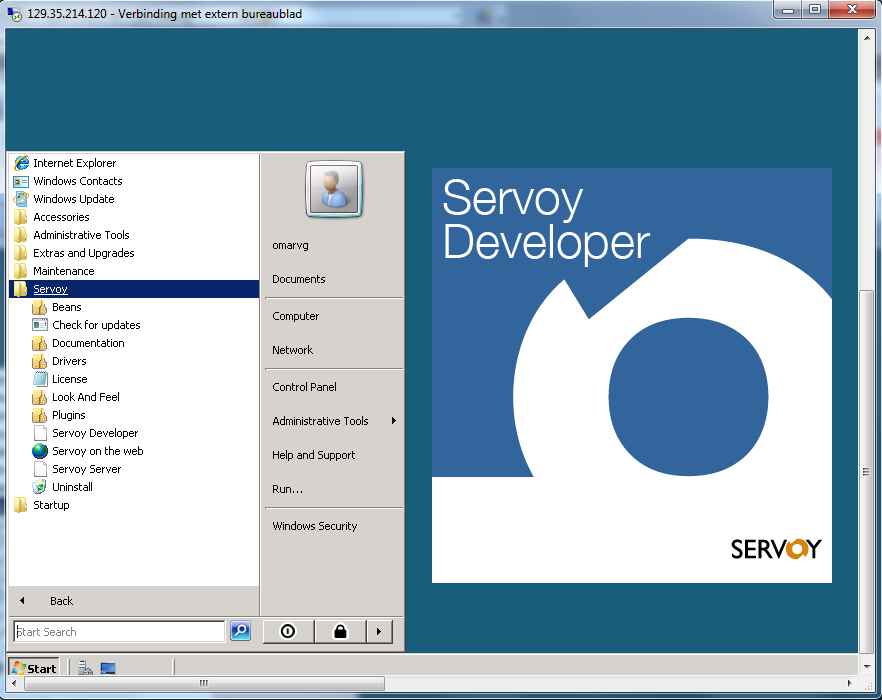
To create a new Remote Desktop connection do the following (if you are running Windows):
- Click the Start button
- Click All Programs or the alternative in your Locale
- Click Accessoires
- Find the Remote Desktop icon and click it
- Enter the IP-address in the Computer field
- If necessary expand the options
- Enter the username. Yes, that's right, the one I told you to write down :-)
- Save the connection details and press Connect
- A dialog will open asking for your password depending on your settings
- Et Viola! Your remote desktop appears.
And maybe you think to yourself: did I just have somebody install my own Windows 2008 server with Servoy on it without investing anything? That's right!
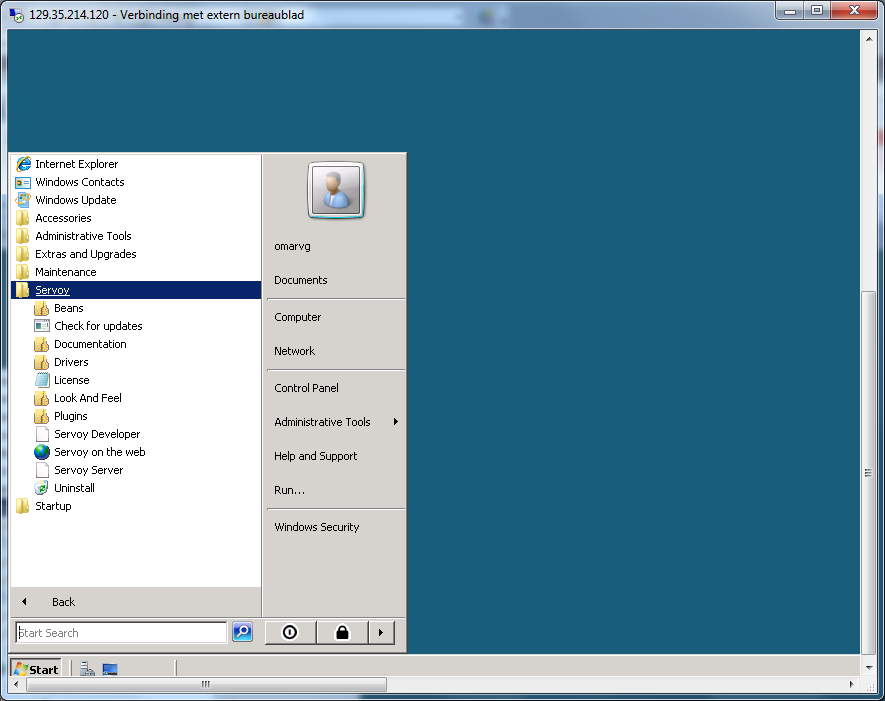
Now you will be able to start Servoy Developer! Note that the image does not yet contain Servoy 6 but Servoy 5.x. A Servoy 6 image is expected to be added in the near future. Of course if you don't want to wait for it
you can install it yourself.
On this server you now have a Servoy Application Server installed as well as Servoy Developer. Note that from this point onwards the meter is running at appr. € 0,078 per hour even if you
have shutdown your server! This adds up to about € 57 per month VAT excluded which is not a lot but a bit of a waste if you are not using it.
Note that if you have shutdown your server you will not be able to connect to it with remote desktop, duh! You can reboot it however from the Control Panel of IBM's Smart Cloud Dashboard.
This will also reset the hour counter but probably not the counter that is used for billing ;-).
Another interesting option is to make a private image from your server allowing you to configure it as you please and restore it later without paying for it in the meantime. You do need persistent
storage space for your image however which currently costs something like € 22 a month depending on how much data traffic you generate. So in general it's probably best to do some testing and then
delete the instance or just leave it up and running and take the costs for granted until you have paying customers that start using it.
Of course you want to know exactly how much the choices you make will cost you. To find out use IBM's cost estimator.
In a consecutive tutorial we will upload an actual project and see if we can get things running the way we want!
To find out how to deploy your solution, read the walkthrough How to - Deploy a solution using Servoy Application Server.
|
External resources:
 vfp plugin vfp plugin
ServoyWorld 2012 pics
Official Servoy website
Ken Levy on Servoy
Servoy info
Servoy Forum
Servoy Documentation
|